After I shot my Big Shot Die Brush how-to video, I had this Basic Gray butterfly on my desk and instead of letting it go to waste, I had to put together a card!
It is so quick and easy to do and I love how pretty it turns out!
Play with color by Watercoloring UNDER a die cut!
All you need is your card base and a piece of Watercolor Paper. My cardbase is 8-1/2” x 11” and my watercolor paper is 5 1/4” x 4”. To get started, I got my paper wet under where the coloring was going to happen by just running my Aqua Painter across the card front – this helps your colors go on more smoothly. Then I could start picking up my favorite colors from my ink pads (make sure you squeeze your ink pad so the ink gets on the LID of the ink pad and then use the Aqua Painter brush tip to pick up the ink from the LID not from the surface of your ink pad!).
Start with the middle color (Daffodil Delight) and color out a bit. Periodically place your butterfly die cut on top to gauge how far out to color. Then add a second color (Melon Mambo) on either side of the middle color. Then make it extra sparkly by brushing Clear wink of stella over where you watercolored. It is hard to see but oh so pretty!
Don’t forget the final touch of stamping your sentiment – I LOVE this font form the Apple of My Eye stamp set. And then adding a bit of the Melon Mambo/Basic Black baker’s twine from the Combo pack in the Occasions Catalog.
See… Quick, Easy, Cute!
What I Used to Make This project
Click any picture below to shop or see it in the online store
And if you didn’t see my video on making the Butterfly, you can check it out here to see how easy it is to cut the butterfly and knock out the little pieces of the butterfly in no time!
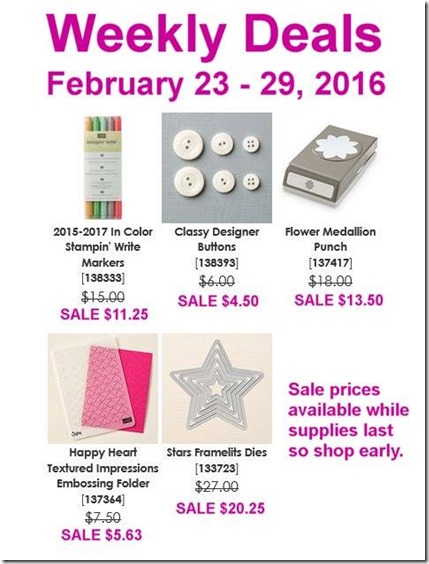
New Weekly Deals out today too!
Before I forget, new weekly deals came out today too!
See the weekly deals online here!
![NWstamper signature_thumb[9] NWstamper signature_thumb[9]](https://i0.wp.com/www.nwstamper.com/wp-content/uploads/ad87b4046c1e_C9F6/NWstamper-signature_thumb9_thumb.png?resize=322%2C118)
Use Hostess Code Z4ZAG9TD at check out to get a special thank you from me!


