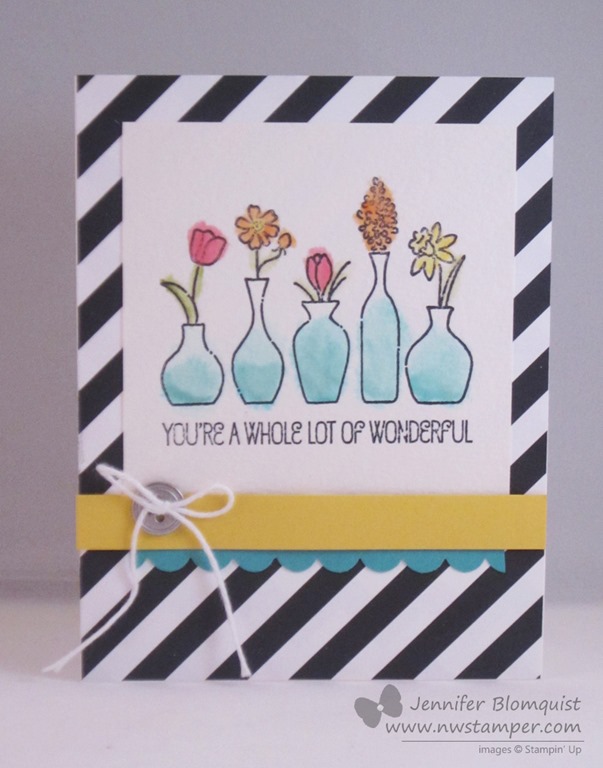
This week, I thought I’d share some inspiration for some of the fun new stamps from the Spring Catalog. In my downline group (the demonstrators in my Fun n’ Crafty group) all created some amazing cards and I wanted to make sure everyone got a chance to be inspired by them!
Today, I wanted to share a stamp that I LOVE that is also great because it is a single stamp, so it doesn’t take up much space, is inexpensive, and can be used a number of ways (even in ways that may surprise you). For now, though, I thought I would share a couple ideas to get you started! I’m talking about Vivid Vases.
This was a make & take from Leadership this year and I loved how they used the geometric paper because I sometimes have a hard time figuring out how to use bold patterns but I loved this as a basic black and white striking background for the card.
But really, the main thing we got to play with for this card is watercoloring the flowers and vases.
When you want to do watercoloring like this, it works best when you start by
- Stamp your image with Stazon ink on watercolor paper. By using watercolor paper, it lets you use extra moisture to get the mottled and diffused look without it tearing or pilling up your paper.
Plus it gives your cards a fun texture because the watercolor paper is thicker and textured. - Squeeze your desired ink pad while it’s closed so a little bit of the ink transfers to the top of the ink pad. Use that like a paint pallet and pick up the ink with an Aqua Pen.
- Color your image with the pen like you would with a marker. Add more color if you need.
- When you are done with that color, scribble your pen on a piece of scrap paper until no more color shows on the paper. Then you can move on to your next color.
Cute, right?
Or get more fun colors by using paper piecing like my friend, Liz Mitchell! Check out her great idea with this stamp set.
I love how she took contrasting designer paper patterns (in this case from the Gingham Gardens paper pack) and made a mat for her card base and then cut out a smaller piece that she cut an oval out with the Oval framelit.
Doesn’t it make a perfect picture frame?
Then to add an extra pop of color with the vases, she stamped the stamp image again on scraps of patterned paper and then just cut out the individual vases. Then you just glue them down to your main stamped image on a piece of white paper!
Color in the flower buds with markers and you have a bright cheery card!

Virtual Stamp Club Hostess Code – BNDDMDVU
Use this code to get free exclusive tutorials & project kit! Learn more
 Stampin’ Up! Supplies Used
Stamps – Vivid Vases
Ink – Stazon, Melon Mambo, Daffodil Delight, Pumpkin Pie, Tempting Turquoise
Paper – Watercolor paper, Daffodil Delight, Tempting Turquoise cardstock, kaleidoscope designer paper
Accessories – Scallop edge punch, Aqua Pen


